Vinegar etching is easy to do, and can produce dramatic results. Native American pottery and petroglyph designs are particularly adaptable to this method, as they use minimal colors and depend largely on pattern and design.
Here are the materials you will need:
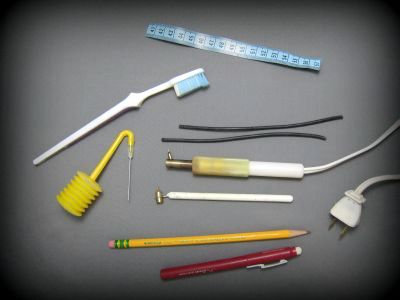
A regular pencil (medium or hard graphite is best).
A white, non-abrasive, eraser (Pentel makes these).
A Kistka wax pen, either electric or manual (candle heated) and beeswax strips.
A section of measuring tape for mapping the egg design.
A toothbrush, for removing the surface.
An egg blower (Blas-fix is shown).
Not shown: White vinegar, naphtha (for removing the wax), Kleenex. And a clean brown chicken egg. Leave the insides in the egg for weight – you will empty it later.
For a complete list of supplies, and where to buy them, see my Supplies For Egg Artists page.
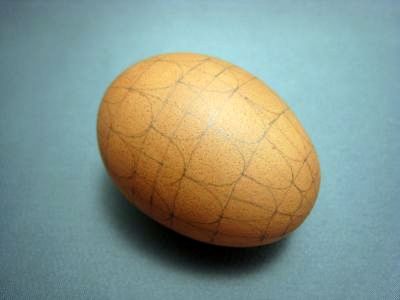
Step 1: Lightly, with a pencil, draw lines dividing the egg into eight sections. Vertically (top to bottom) in quarters, and then horizontally around the middle. This will help to keep your design organized and centered. (see my tutorial: How To Map Your Egg) Make more divisions as desired. Lightly sketch in your design.
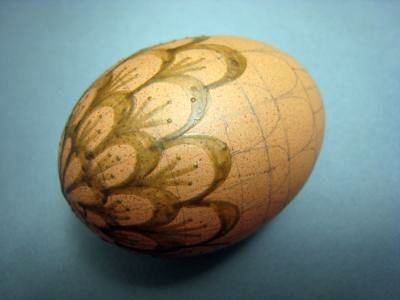
Step 2: With your kistka (wax pen), fill in the design. You will be waxing over the parts that you want to remain the brown color of the eggshell. The negative space (non-waxed) will be very light, almost white when you are finished etching.
Step 3: When the design is completely waxed in, set the egg in a jar of white vinegar. Assure that the egg is submerged completely in the vinegar.
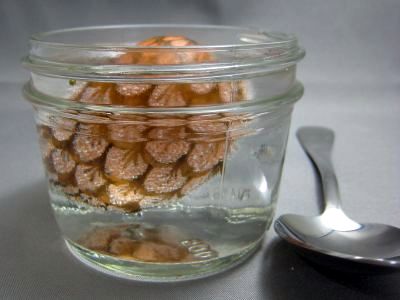
Note: Bubbles will form on the surface of the egg because of the reaction of calcium to vinegar. These bubbles will float the egg like a life jacket. You’ll want to spoon the egg out a few times during the etching process so the bubbles can disintegrate and allow the egg to sink to the bottom again.
Step 4: The egg should take anywhere from 15-30 minutes for the brown surface to dissolve. Remove the egg and brush the surface lightly with the toothbrush to remove the residue. Sometimes, the bubbles that have formed will prevent the etching and you will have a spotted surface. You may re-submerge the egg in the vinegar if you want to remove more surface.
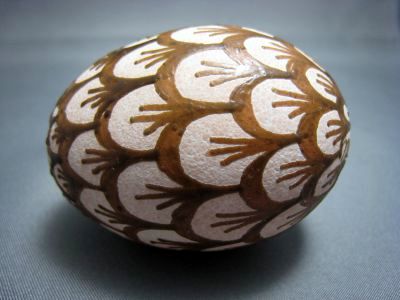
Step 5: Now, you can remove the wax. Lower the egg into a glass jar of naphtha, and let it work for about 5-10 minutes. Spoon the egg out carefully and grasp it with a Kleenex. The egg will be very slippery, so support it with the spoon until you have a good hold on it. Wipe the surface with the Kleenex, rolling it around in the palm of your hand, until the wax is removed. Give it a second dunk in the naphtha, and wipe with a clean Kleenex to remove any residual wax.
Note: I use naphtha (available at hardware stores) because it works quickly. But it is harsh on your hands. And extremely flammable. You may also remove the wax by heating it with a candle and melting off the wax. Be careful not to cook the egg inside, or you will never get it emptied.
The raw egg is now ready to empty and varnish.
You Can Also Dye an Etched Egg!
I use brown eggs for the natural look enhancing the brown color of the egg shell, and I will use white eggs when I want to add some color. The white eggshell takes the dye differently after the etching process. Vinegar is a mildly acidic liquid. You will have a whole new perspective on traditional egg designs when you see what the etched surface of the egg looks like when color is added. The lighter shade of colors gives them an interesting effect.
Clean eggs are important when vinegar etching. While the vinegar will remove the surface of a bare eggshell, if you wax over any pencil lines, smudges, or dirt, the flaw in your egg art is there permanently.
You can use your jar of white vinegar for several eggs, but eventually, you will get residue in the bottom from the eggshells. Best to replace the plain white vinegar after 3 or 4 eggs.
Ukrainian Easter Eggs are amazing works of traditional egg art and are especially pretty when you use the traditional design and etch off some of the back surfaces.
Batik – patterns of color on white give a boho look to the whole egg. These look especially pretty when you use different colors of dye and string the empty eggs on ribbons so they hang in a colorful cluster. My favorite is making the etched blue eggs. The blue color on the etched surface is bright like a blue sky!
For a New Look
I did some experimenting with an emu egg shell, and the results were amazing! The emu egg shell is dark green so it is a little difficult to see the wax lines, but when the surface is removed, the color underneath is a lighter green. The contrast is delicious! An emu egg shell is rather large, so I use the vinegar etching technique on my eggshell jewelry. You can see an example in the picture here the emu eggs are the dark green earrings and necklace set on the lower right side.
Be sure to take safety precautions if you use a chemical or a candle flame to remove the wax. Naphtha is basically lighter fluid (which also works if you don’t have any naphtha handy). Work on a soft surface (I put a towel down) so if the egg does slip out of my hand, my hard work is not lost to a countertop crack. Covered areas keep the egg from rolling off the edge of the counter if it slips out of your hand. So, go slow, be careful, and have fun with it!