Making ostrich eggshell jewelry is a long process, and difficult to describe, so during my last “batch”, I shot a few pictures while I was working so you get an idea of what all goes into creating these little pieces of wearable art.
At the end of this tutorial, I have included a supply list of the exact tools I use to make ostrich eggshell jewelry.
First I start with a clean ostrich shell. I can use broken shells instead of whole ones, which saves me a bit in materials cost. By the way – I purchase my ostrich shells locally from Floeck’s Country Ranch, an ostrich farm in Tucumcari New Mexico. They have nice healthy birds that produce wonderful strong shelled eggs.
But OK, on with the tutorial . . .
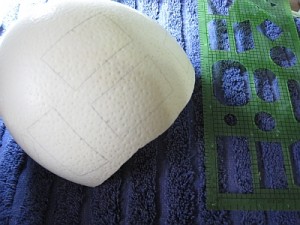
Using a plastic drafting template, I draw the outline of the jewelry piece directly onto the shell with a pencil. I try and fit in as many pieces as I can while avoiding fractures in the shell, and any defects on the surface.
Tip: Leave at least 1/2 inch space in between each outline to allow room for cutting. You lose more of the shell than you would think.
After I have the shell mapped out, I cut the pieces out with a diamond cutting wheel attached to a Dremel Rotary Tool
, being careful to leave extra cutting room around each piece.
Note: If you are going to try this – be sure and wear face and eye protection. Meaning safety goggles and a good particle (dust) mask
while you are cutting the shells. You don’t want to breathe in the eggshell dust or get any flying pieces in your eyes.
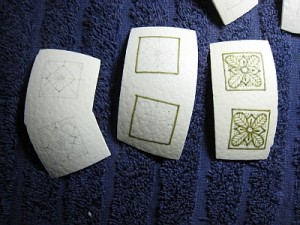
Next, I start the design process. Drawing lightly with a pencil, I sketch out the basic design. Then, with a wax pen (kistka) I draw the edge of the jewelry piece and any part of the design that is to remain white.
I continue with the wax and dye design – dipping the shell piece in the dye, and then waxing over the area where I want that color. More dye, more wax, layer on layer, until the design is finished. And I have multicolored fingers.
I can then remove the wax by soaking it in a jar of naphtha until the wax is dissolved, rubbing the excess wax off with a tissue until the design underneath is revealed.
Giving the front side a light coat of varnish (rubbed on with my finger) to protect the color, it is now ready for epoxy fill.
Mixing small batches of two-part tabletop epoxy, I drop a small amount onto the back of the shell piece and spread it around with a clean popsicle stick (or something similar) until the epoxy coats the back surface, and pools in the cup.
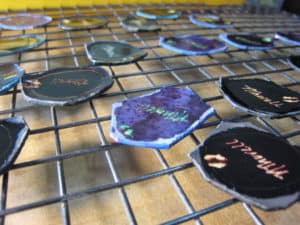
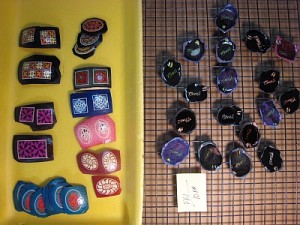
I set them on a drying rack, as shown, and tip the shell piece to center the epoxy so it cures nice and level in the shell. I place the rack in a warm spot and place a plastic bin over it, to keep in the heat and prevent dust from adhering to the epoxy. This particular epoxy has to cure for three days. Short-time cure epoxy is not as hard and I want a glass-like surface.
I use a clear tabletop epoxy for optimum hardness, and so my signature shows through. They should cure for about 72 hours.
Next, finish and shape the edges with your Dremel rotary tool fixed with the sander attachment.
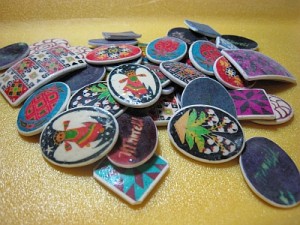
Now it is time to finish the front side. Remember, the front side has varnish for protection right now, you want to have a hard epoxy surface so it can be handled and rubbed without damaging the design. And the epoxy finish will really enhance the colors.
Clean the pieces thoroughly (the sander dust will cause inclusions) and spread the final coat of epoxy on the front side.
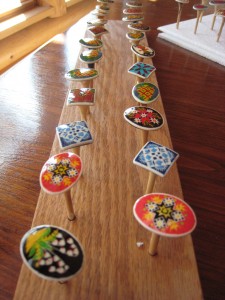
To hold them in place to cure, I put a blob of paraffin wax into the cup of a golf-tee, and plant the shell piece on top. It works as a holder, and after you spread the epoxy on, you can spike the tee into a holder (styrofoam block works great too), cover them with a clear storage bin to keep the dust off, and let them sit for another couple of days until the surface is hard and glassy.
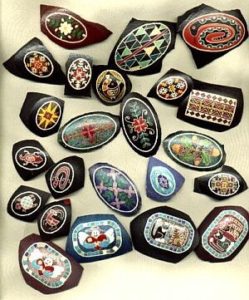
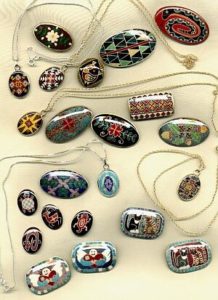
When finished – add findings to create beautiful jewelry! I purchase most of my sterling silver findings at RioGrande.com or at Etsy.com
Supply List for Ostrich Eggshell Jewelry
Note: Some of these are affiliate links. I receive a small commission if you make a purchase from these links, which helps keep this website free for you!
Floeck’s Country Ranch
Diamond Cutting Wheel
Dremel Rotary Tool
Safety Goggles
Particle (dust) Mask
Plastic Drafting Template
Two-part Tabletop Epoxy
Rio Grande – sterling silver findings
Etsy – sterling silver findings